Want to learn how to make stuff? build stuff? grow stuff? The Lost Coast Outpost will occasionally be bringing you guest posts from experts in their fields that will give you a bit of information on living sustainably and cultivating old-fashioned skills in a modern way.
Today’s post in our Homesteading Humboldt series is written by Josh Reed who is co-owner of Humboldt Beer Works in Eureka which specializes in homebrewing equipment and ingredients. He is the recipient of many local awards for his brews. He opened Humboldt Beer Works in 2011 with co-owner Jamie Ashdon, also a recipient of many local awards and accolades for his brews. Together, they also started a local homebrewing club in 2010, the Humboldt Homebrewers, who meet monthly. Follow their Facebook page, Humboldt Beer Works, follow them on Twitter @HumBeerWorks or Instagram Humboldtbeerworks.
When the 21st Amendment repealed prohibition in 1933, the text of the law legalized home wine making, but overlooked home beer making. This went uncorrected until 1978, when President Jimmy Carter made homebrewing legal on a federal level, but unfortunately, it took another 35 years for all the states to follow suit. Finally in 2013, Mississippi, the final holdout, legalized homebrewing.
Luckily, in California, we didn’t have to endure such draconian laws for so long. California jumped on the legalization bandwagon fairly quickly. Which is one reason why we have more breweries than any other state. Almost every craft brewery started in the kitchen or garage of a homebrewer. In this state, we can legally brew 200 gallons of beer per year at home if there are two adults, or 100 gallons per year for one adult.
Most of Humboldt County is actually an ideal place to brew. Mild temperatures year round make it easier for the homebrewer. Many places in the country are either too hot in the summer or too cold in the winter, or both, making very small windows of opportunity to brew unless a brewer has the right equipment.
Most people who start out brewing will eventually wonder, “Can I save money by brewing my own beer?” Eventually, yes you can. Starting out, you will have an investment of equipment and beyond that, the ingredients to make a batch of beer will cost you about the same as going and buying beer. A typical “batch” yields 5 gallons, or roughly two cases worth of beer. And ingredients to make beer, depending on recipe, can cost you anywhere from $35-$50. True money savings comes later as an experienced brewer.
A beginner brewer will be a “malt extract” brewer, as opposed to an “all-grain” brewer, like big breweries are. Liquid malt extract is thick and syrupy, much like honey. Dry malt extract comes in powder form. Extract essentially takes place of mashing malt, which is a huge part of the process for an advanced brewer. Extract has all the fermentable sugars you need to make beer, however it needs to be diluted with water and then boiled to achieve “wort” (pronounced “wert”), which is unfermented beer.
 Liquid Malt Extract
For the beginner, it may seem like a difficult task but in all honesty, the beginner brewing process is much like making soup. You follow your recipe of ingredients and boil them for an hour. This recipe includes hops added at various times during the boil, and may even include crushed grains to steep (like making tea) or even different types of sugar or spices. The more difficult part happens after you are done boiling.
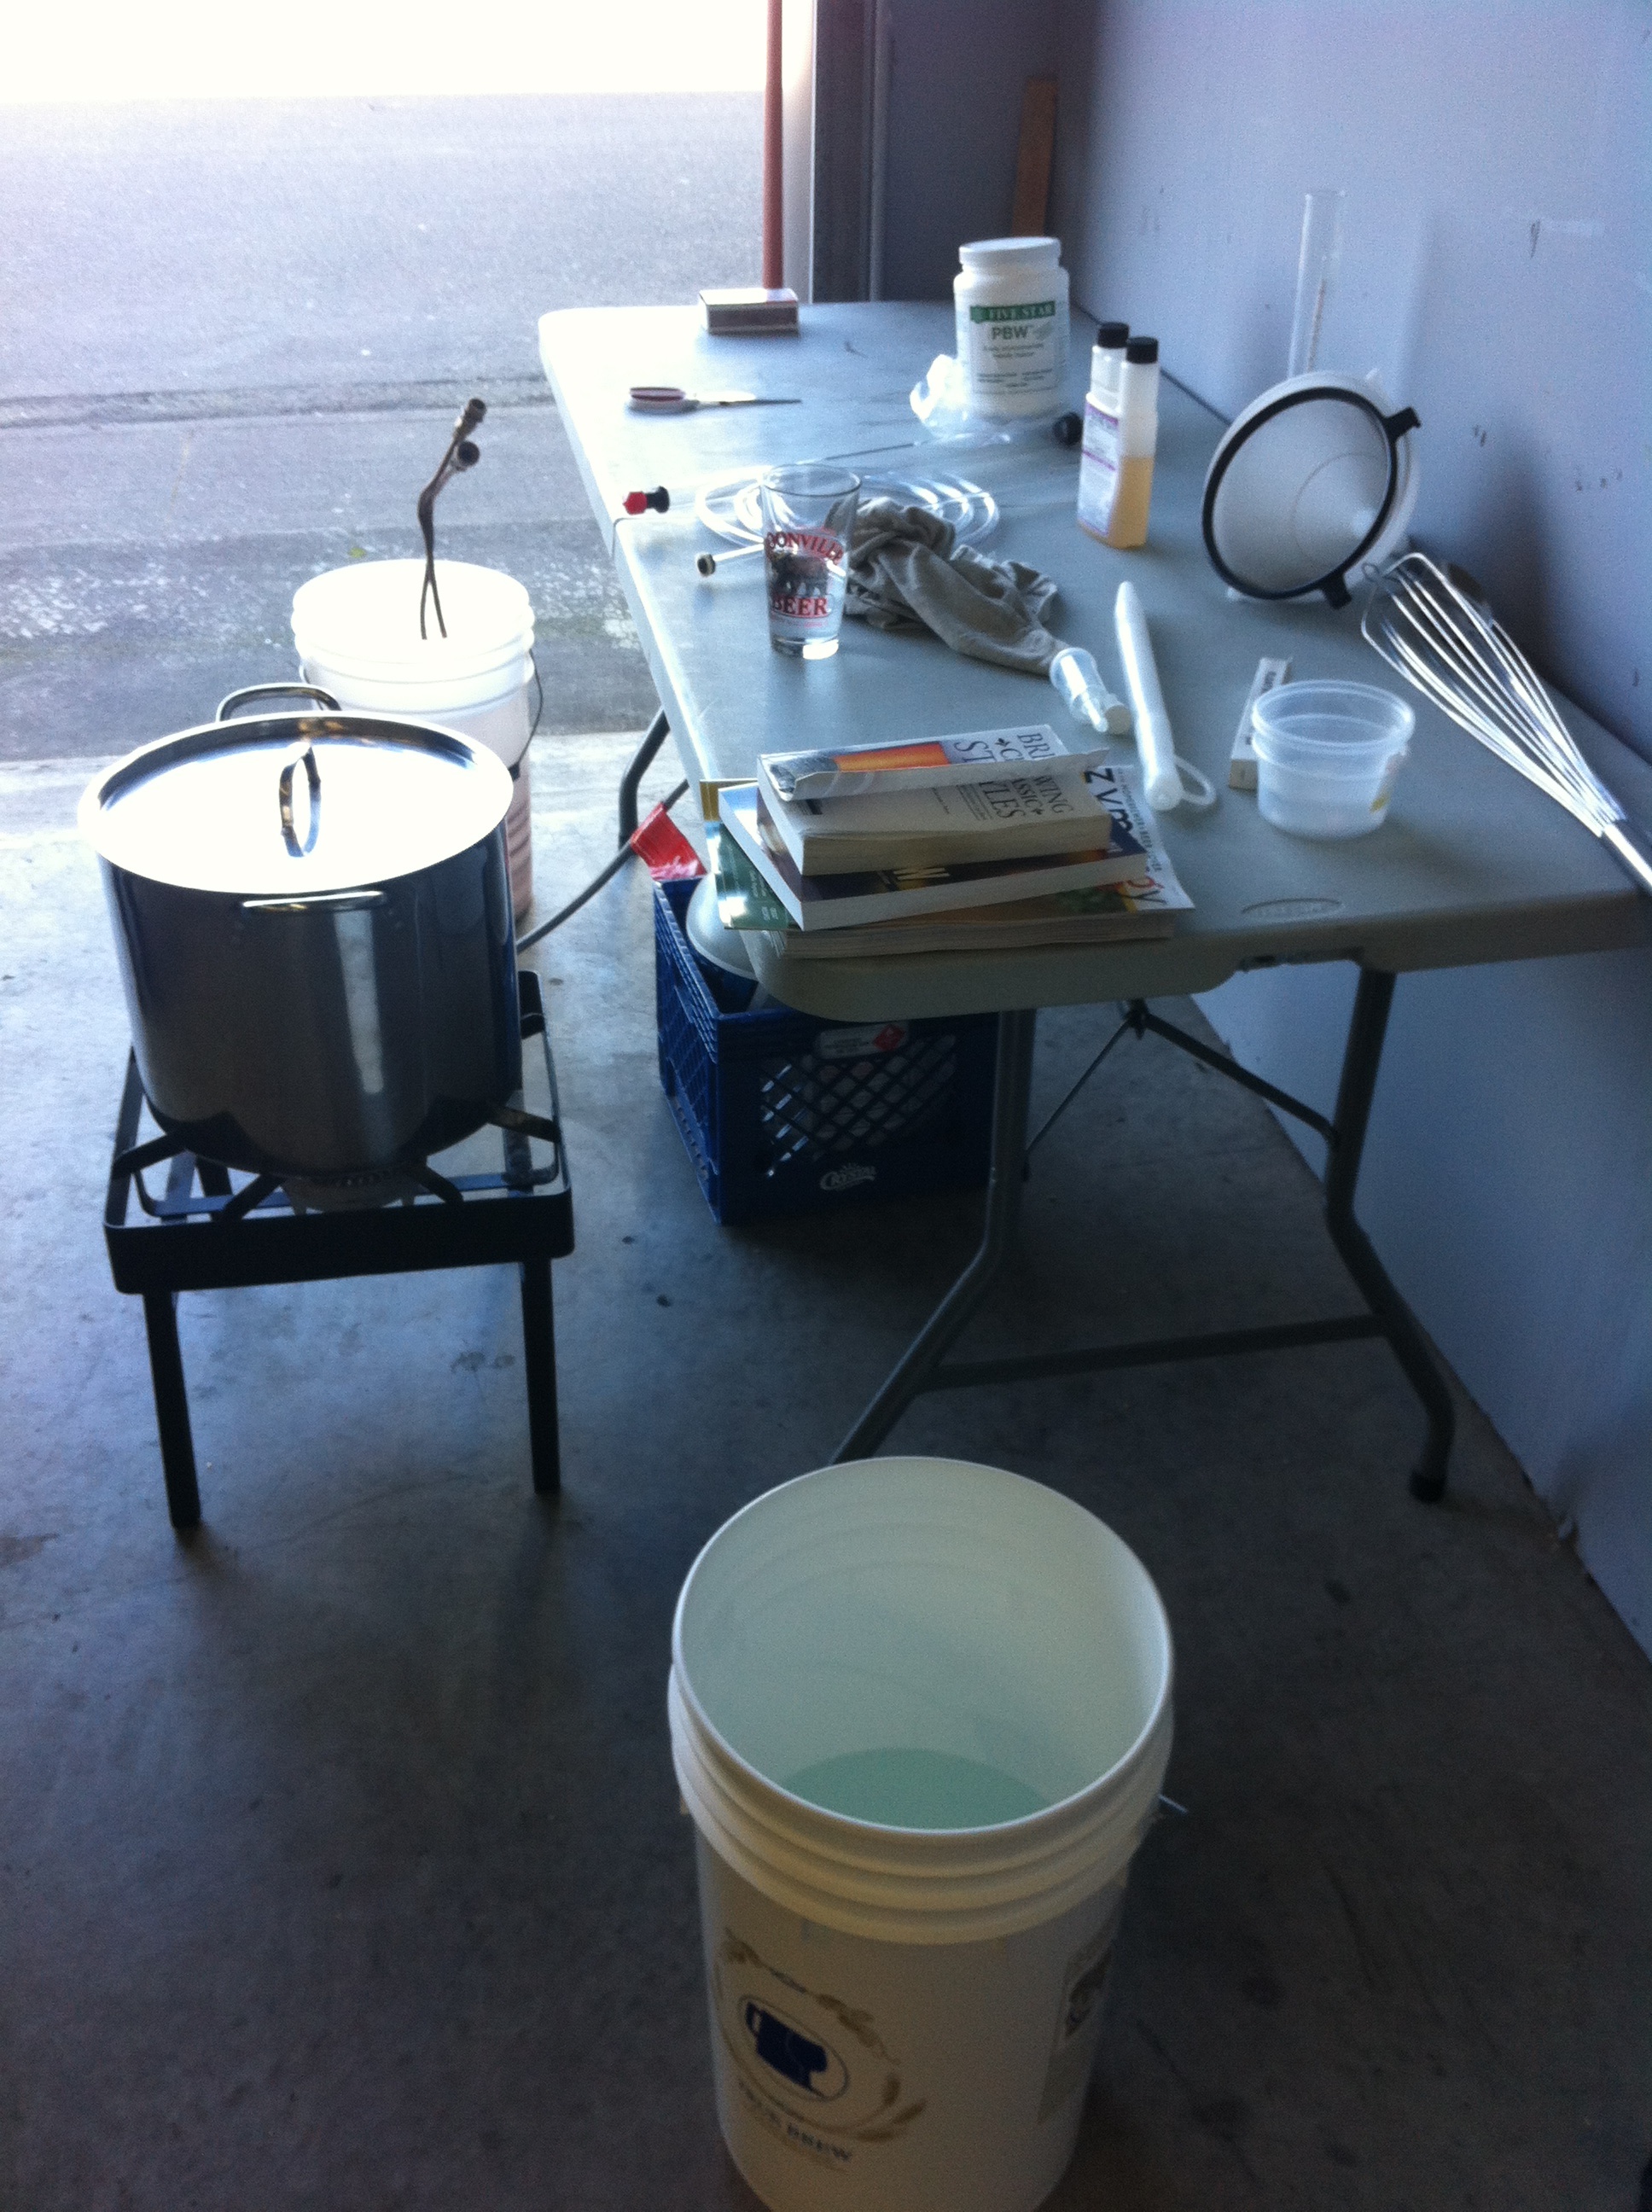 Brewing Equipment
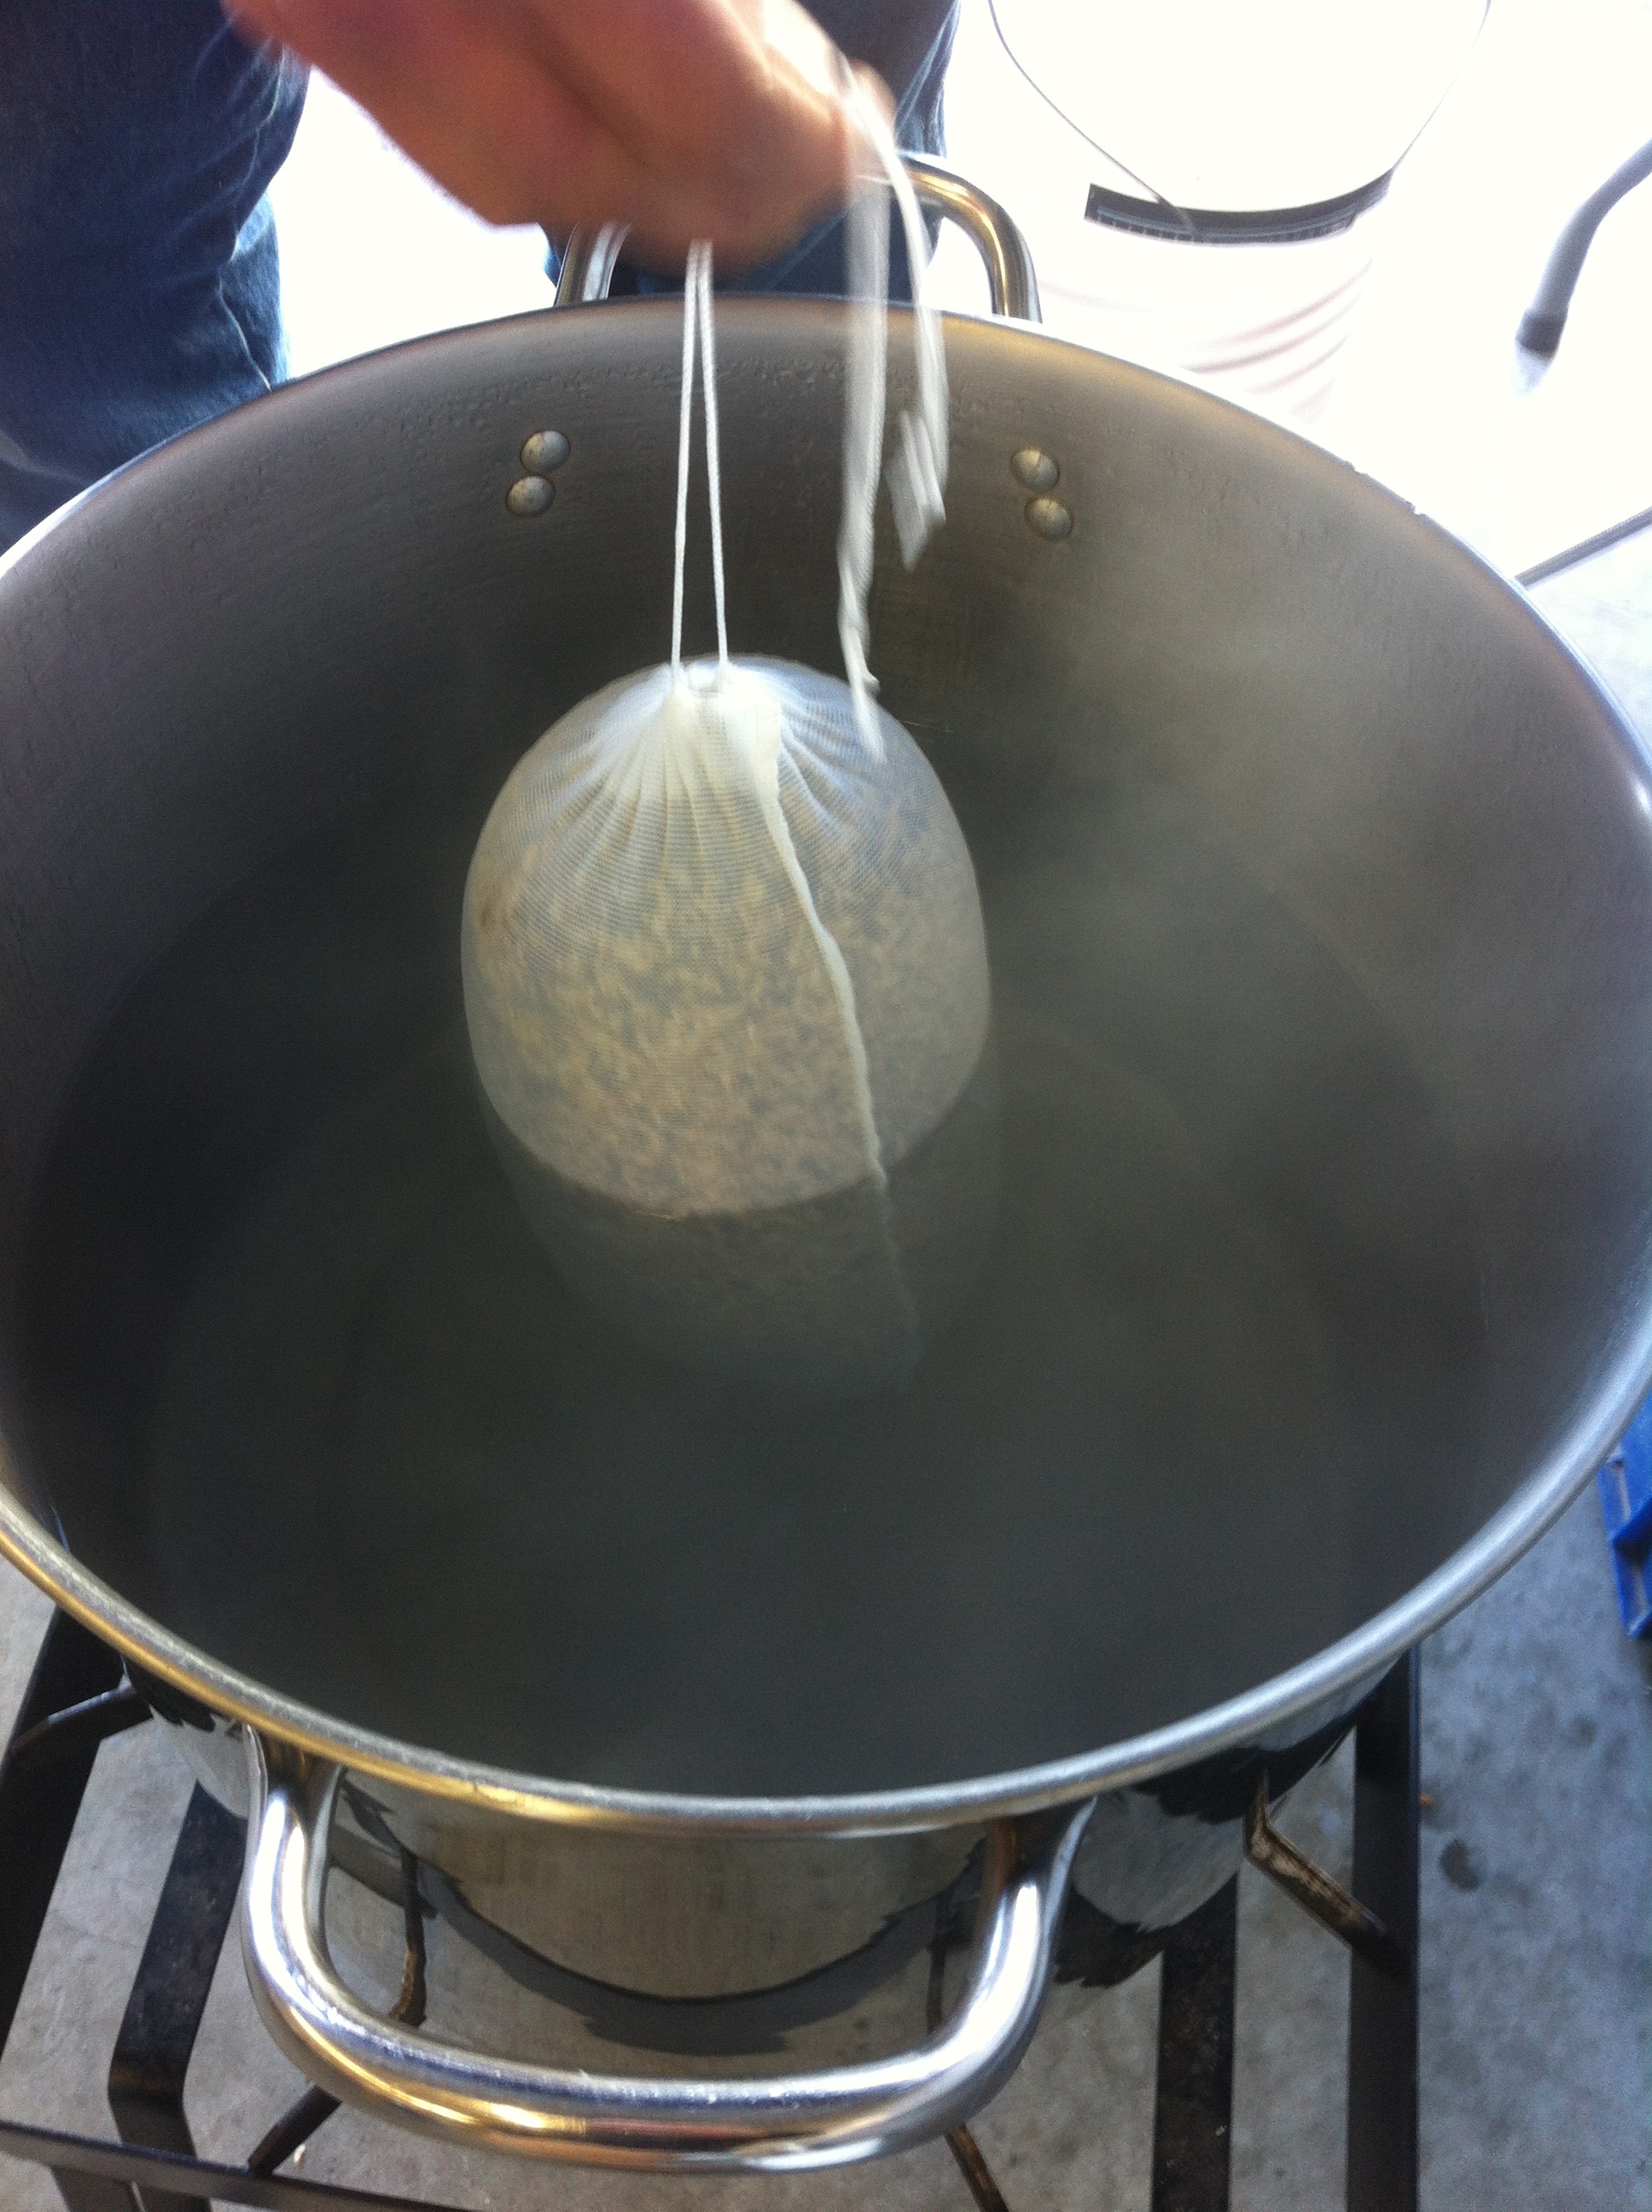
Steeping grain.

Boiling Wort
Once you are done boiling your wort, you need to chill it as soon as possible to about 65 degrees so it can accept the yeast that will turn it into beer. The yeast will eat the sugar and their byproduct is alcohol and carbon dioxide. Sanitation is very important during this stage. Anything touching the beer after the boil is completed needs to be sanitized. Sanitation and handling of the beer during this fermenting stage tends to be the difficult part for the new brewer. But with patience and common sense, this should be easy to overcome.
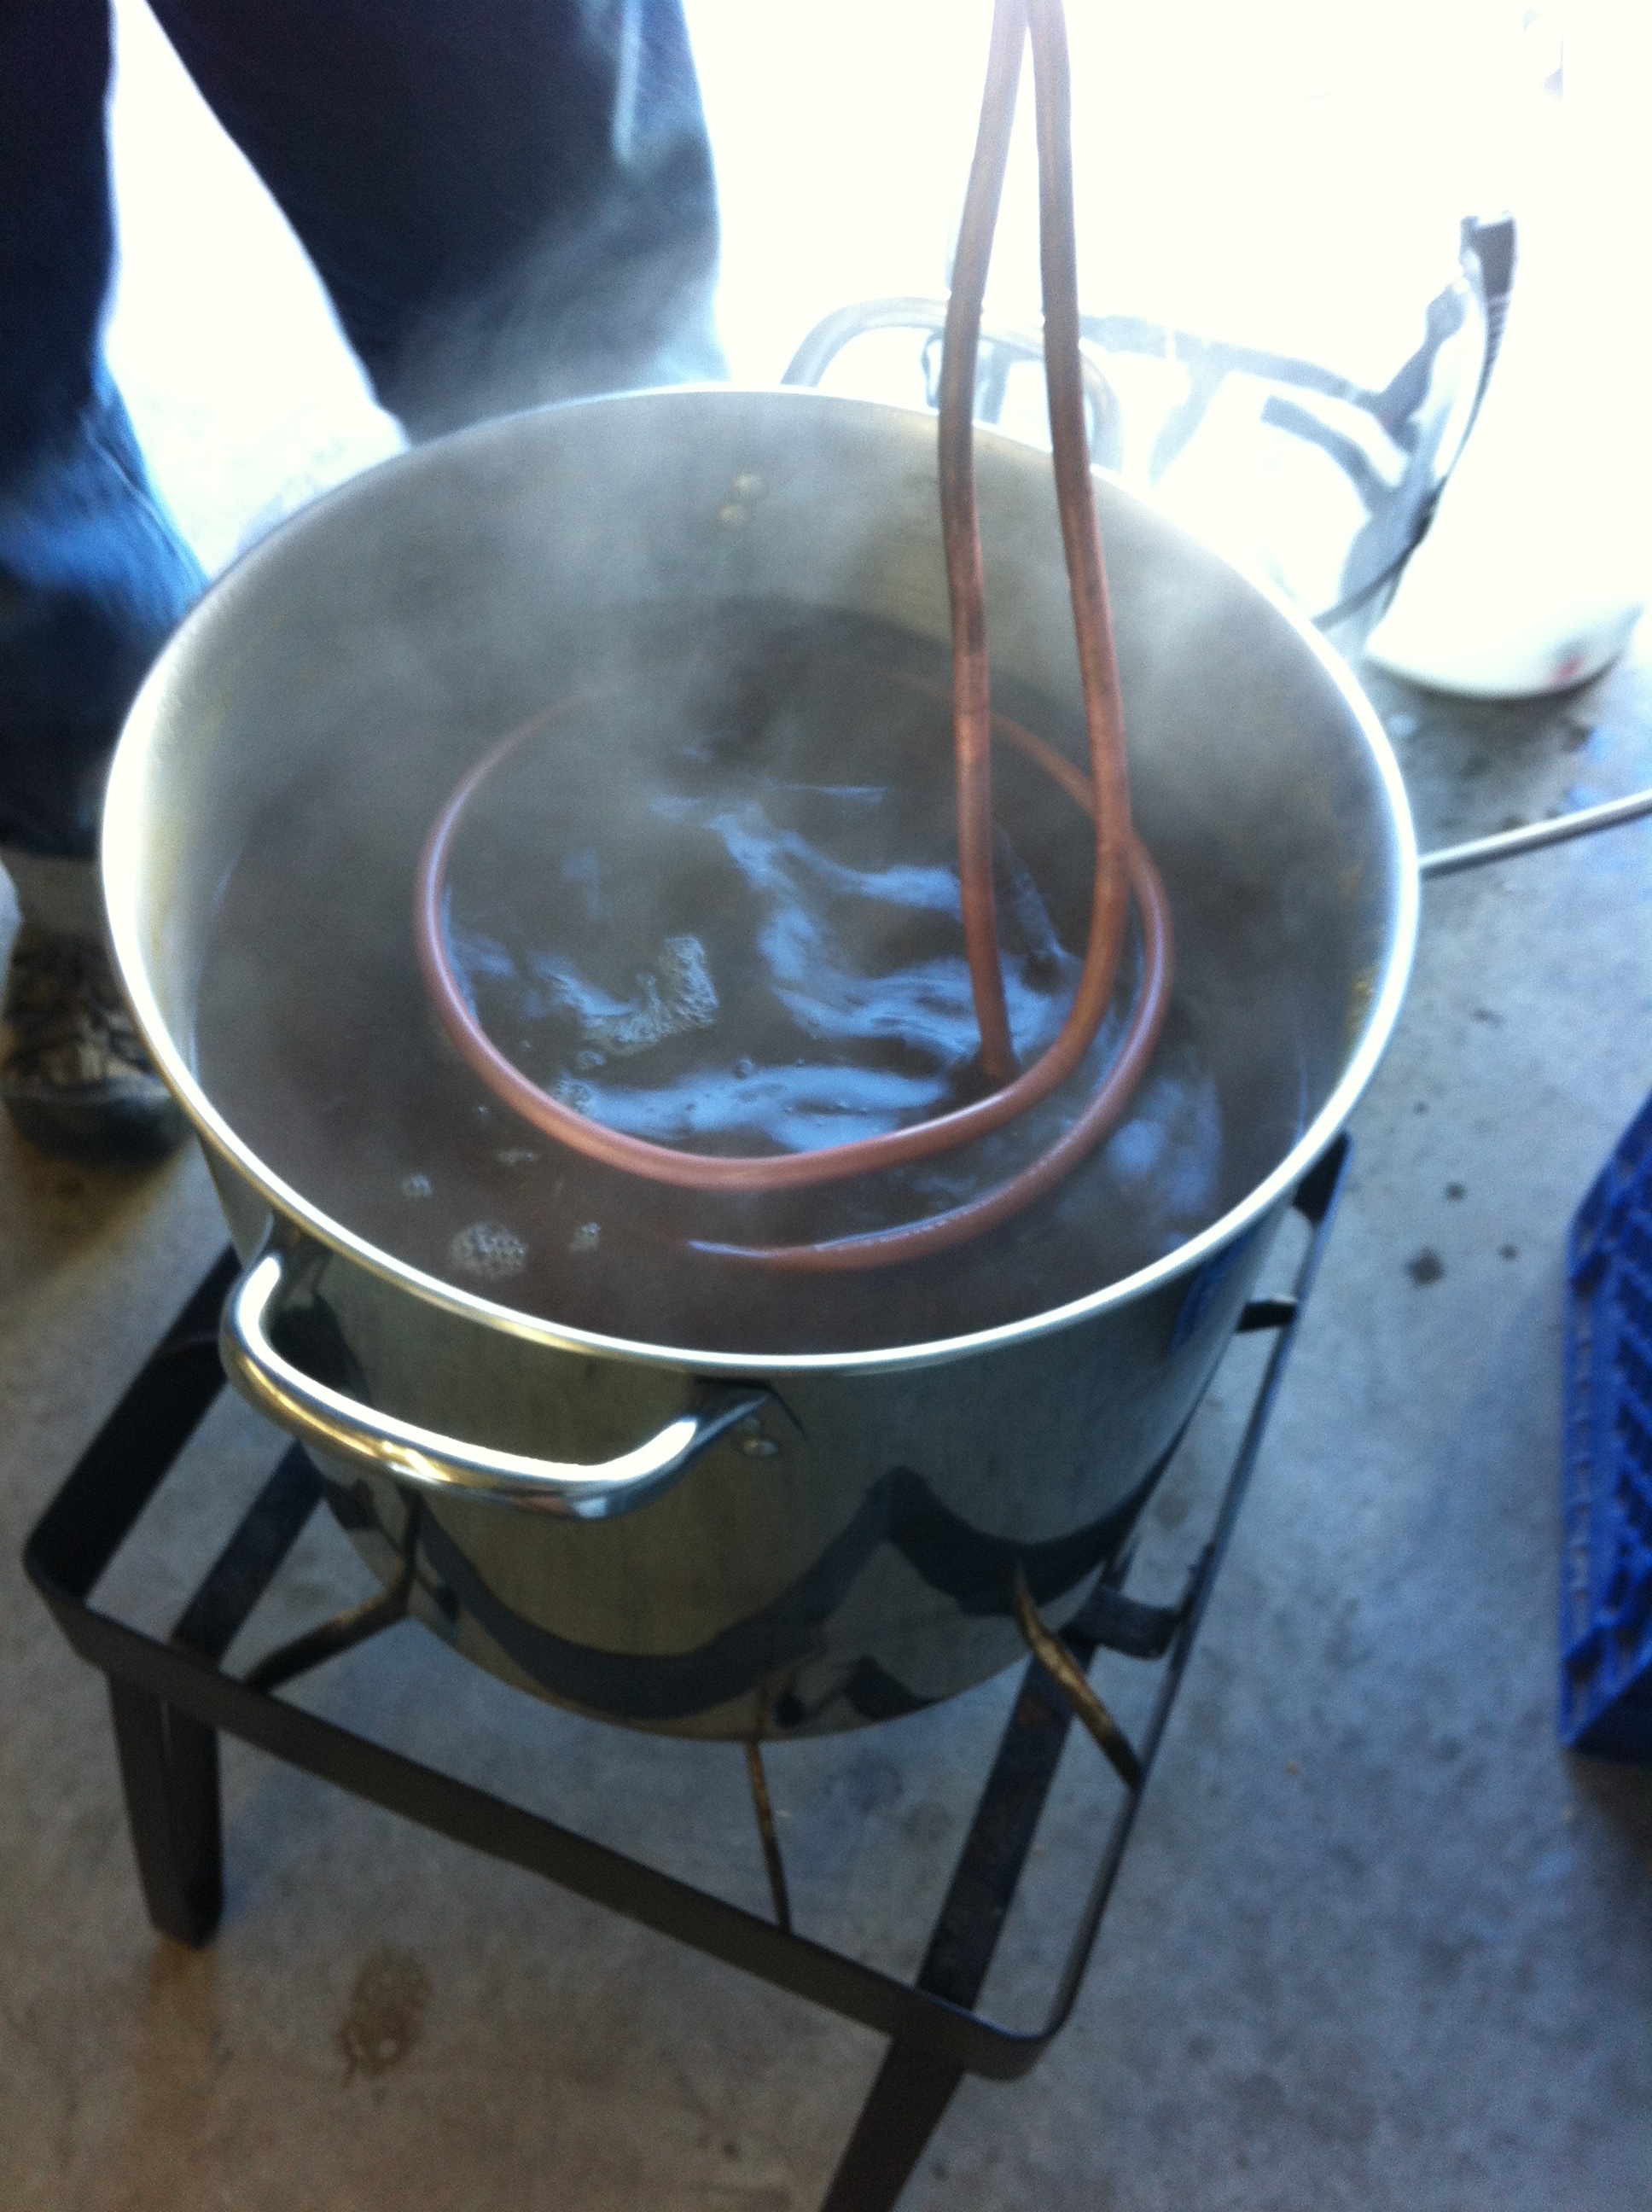
Chilling The Wort
The beer will then take next 10-14 days to completely ferment under ideal conditions. Most of the fermentation will take place in the first few days but the more it sits undisturbed, the more in conditions into the beer you are looking to make. Patience can be very difficult for the new brewer, especially on their first batch.

Racking the wort into a fermenter
Once beer is finished fermenting, the homebrewer mixes a small amount of sugar with the beer, fills the bottles and caps them. This process is done to make carbonation. What is essentially happening is you are making a small fermentation inside the bottle. There is still yeast alive in the beer and when you give them a little more sugar, they release carbon dioxide inside the bottle but it is trapped by the cap. There is a method to this, however, because if you use too much sugar your bottles can explode!
If done correctly, the bottles need to sit at room temperature for another 10-14 days to complete the carbonation process. If you have done the math, it takes 3-4 weeks to make a batch of beer until the time you can drink it. If your first batch is less than stellar, do not be discouraged. Nobody has made a great beer on their first try. Don’t give up if this happens to you. Four simple ways to vastly improve your homebrew is to do a “full volume” boil, aerate your wort before you “pitch” your yeast, use proper amounts of yeast, and ferment the beer at the proper temperature.
Full Volume Boil: Many beginners will do a concentrated boil. Usually this is due to reading some bad or outdated beginner instructions. Typically these instructions will say that the boil for a 5 gallon batch should be about 3 gallons in volume, and the wort is topped off in the fermenter with water. While this is ok, it’s going to create a bit of harshness to the finished beer. There will be an unpleasant bite. This happens because the boil has been concentrated to where the sugars are caramelized or even burned. This can be avoided by doing a full volume boil of 6-6.5 gallons. During the boil, there is evaporation loss and in the fermenter, there is loss of beer through “blowoff” and “trub” (pronounced “troob”). Between the expected losses, if you start with a full volume, you should end up with about 5 gallons, give or take.
Aerate your wort: The act of boiling the beer nearly rids it of all oxygen that may have been present in the beer. Oxygen needs to be reintroduced into the wort. The yeast needs this oxygen to remain healthy and get to work quicker. This is important. Aerating your wort prior to adding your yeast can be accomplished by capping your fermenter and shaking it for several minutes. There are several other ways to do this that you learn later on.
Pitch the proper amount of yeast: Yeast is yeast, they will do their job eventually, right? Well yes, they will. But you want a short “lag phase”. This is the time between putting the yeast in the beer (pitching) and the first signs of fermentation. Having alcohol present as soon as possible is important to avoid infecting the beer with a spoiling micro-organism. Most beers, especially stronger beers, need lots of yeast for many different reasons. And most commercial liquid yeasts available to the homebrewer aren’t quite enough yeast to do the job of a short lag phase. Age of the yeast and how it has been stored effects its viability a lot. Do your homework on the yeast you use and make sure you have enough. Experienced brewers will take their store bought yeast and make a “starter”, which is a very small batch of beer. This propagates the yeast into more yeast cells and gets the yeast in the mode of eating maltose and they will be ready to work when you need them. This also aids in a shorter lag phase.
Ferment at the proper temperature: Most beginners will start out making an ale as opposed to a lager. Lagers take a bit of practice and ales will be more forgiving. The main difference is the optimal fermenting temperature that the yeast likes. For ales, the beer needs to be in the 60 degree range, usually in the lower range of the 60s. However, if you put the beer in a 64 degree room, that does not mean the beer will be 64 degrees. The act of fermentation actually creates heat, so to offset this, an ale should be in an environment of the high 50s away from light. Fermenting too warm can produce many off flavors in the beer. In a few beer styles like saison, warmer fermentations is acceptable. If you cannot achieve proper temperatures, this is a good time of year to make a beer like saison. The last saison I made, I fermented it in the high 80s!
As mentioned before, you can save money by making your own beer. Many experienced brewers will brew a few times a month or make 10-15 gallon batches (or more). These “all-grain” brewers usually buy ingredients in bulk and learn to reuse yeast (yes, you can reuse yeast) and with all these methods employed together, you can make a basic beer for less than 50 cents per bottle. Much of the cost for an extract brewer is tied up in the extract itself. Brewing with all grain is much cheaper, but a longer and more difficult process. With an investment on starter equipment, you can enjoy making beer in your own home and with practice, make a beer tailored to suit your tastes that you can’t find commercially and make it over and over again, consistently!
CLICK TO MANAGE